
Showing posts with label primitive shelters. Show all posts
Showing posts with label primitive shelters. Show all posts
Tuesday, 24 February 2015


Thursday, 9 May 2013
Working on a Wigwam for a Winter Shelter.
I thought it was about time I did some more experimenting with a different type of shelter, so I decided to make a Wigwam. These images show just the framework, later I will have to pull it apart & move it to a winter camp site in the forest. Then I will cover the framework and take more photos.


Saturday, 26 May 2012

Monday, 26 December 2011

Tuesday, 8 November 2011
Saturday, 5 November 2011
Wattle and Daub.
Wattle daub as a construction method was very popular, and the Europeans took this method with them to the New World.
Wednesday, 2 November 2011


Saturday, 28 May 2011
Tuesday, 6 July 2010
Activities on a Trek and Camp.
The activity starts of course with the trek itself, it is a good idea to include a small journal in your gear so you can keep a record of your trek and any changes to your gear that are needed. This can be done in camp when resting.

.JPG)




.JPG)

Keep an eye out along the trail for items that might be needed later. No point in using up your fire starting kindling if you can gather some fresh dry stuff along the way. Look out for plant tinders too.
.JPG)

When you get to your camp site it is time to set up your shelter and get your gear under cover. The type of shelter you make will depend on what is available.


It is always a good idea to make your bed so you are off the ground at night, summer or winter. If I am just camping over for a couple of nights in an oilcloth lean-to, then I make a bed of sticks and cover them with bracken or just throw my blanket on top of the sticks. If it is a more permanent camp, then it is a good idea to make the bed more permanent by using bush poles or logs.


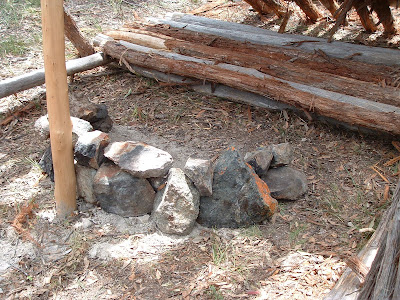
Next you need to get a good supply of wood in for the fire. Stack it close to the shelter so you don't have to get up at night to stoke the fire. If you are camping alone you will probably want to make a fire place that will reflect warmth back into your shelter. This can be done by constructing a dry rock wall on three sides of your fire place.

In a camp where others need to share a cooking fire the fire will need to be more open.

It is always a good idea to wash/clean your kettle after a meal and before bedding down. Food smells in camp will attract certain wildlife, and too you don't want food drying hard in the kettle overnight. If you have a tin lined brass kettle like the one in this image, you do not want to have to scrub it out with sand or other abrasives.
If there is a fishing hole nearby it might pay you to drop a line in before dinner and see if you can't save those trail rations for later.

Cattail Pond in Wychwood Forest.

George Washington's fishing tackle.

This image from Diderot.

My own fishing tackle.
Again if you are on your own you may wish to take along some period reading material to read by the light of the fire at night. If you are like me though you will probably be content to sit with a hot drink and watch the flames of the fire play until you feel drowsy.

The next day after a good breakfast you may need to get some more firewood in whilst the weather is fine. Don't forget to store some kindling under your shelter in case it rains or snows in the night and your fire should go out. Put some heavier wood on the fire at night to help keep it going.
I don't hunt for sport, but occasionally hunt for meat for the table. This is always an option when you are out for several days or more.

When on Historical Treks it is always a good time to practice some of those primitive and period skills, such as tomahawk throwing, if you can find a suitable dead tree, or making survival traps. Cordage is always useful and a good activity when you just want to sit on a cold day in front of your fire. Cordage is useful for shelter construction, primitive traps, hanging game so you don't have to dress it on the ground, hanging your kettle over the fire and making primitive tools.


And in what seems like no time at all, the weekend is almost over, and it is time to make your way back home.

.JPG)
Thursday, 17 June 2010
Reply From Dave.
Dave Reid said...
G'day Le Loup,
I enjoyed the post and the walk through your 'neck of the woods', the pictures were great. I would stamp both those trees as 'Aboriginal scarred Trees'. The first scar appears to be very old. Different species of eucalyptus display different edges when they heal. I would like to know the species.
Unless the scar was from a large branch, I would say that the scar probably caused the tree's death.
Not right away, but slowly. I say this because the interior is hollow (insects, decay whatever) and the obvious entry to do this was via the exposed sapwood revealed by the removal of the bark.
The burnt stump has the signs of a scar at the base of the tree where the tree has tried to 'heal' itself. With a little (probably a fair bit) of imagination you can imagine the pointed oblong shape of a native shield. Well I can anyway.
I reckon people should realise that in a survival situation bark can (and has been for thousands of years)useful as a robust shelter. The first settlers of Australia stripped (ringbarked and later destroyed) thousands of trees for use in bark huts until they could get themselves organised with slab huts.
Sorry to ramble, I am learning a lot from your site, Cheers, Canberra Dave
Dave. Most of the timber in the higher parts is stringybark, with some yellow box.
G'day Le Loup,
I enjoyed the post and the walk through your 'neck of the woods', the pictures were great. I would stamp both those trees as 'Aboriginal scarred Trees'. The first scar appears to be very old. Different species of eucalyptus display different edges when they heal. I would like to know the species.
Unless the scar was from a large branch, I would say that the scar probably caused the tree's death.
Not right away, but slowly. I say this because the interior is hollow (insects, decay whatever) and the obvious entry to do this was via the exposed sapwood revealed by the removal of the bark.
The burnt stump has the signs of a scar at the base of the tree where the tree has tried to 'heal' itself. With a little (probably a fair bit) of imagination you can imagine the pointed oblong shape of a native shield. Well I can anyway.
I reckon people should realise that in a survival situation bark can (and has been for thousands of years)useful as a robust shelter. The first settlers of Australia stripped (ringbarked and later destroyed) thousands of trees for use in bark huts until they could get themselves organised with slab huts.
Sorry to ramble, I am learning a lot from your site, Cheers, Canberra Dave
Dave. Most of the timber in the higher parts is stringybark, with some yellow box.
Monday, 8 March 2010
Friday, 20 November 2009
18th century shelters for Historical Trekking & Camping.

Any port in a storm. This fallen tree will afford you shelter providing you are lying down, though there is room enough to sit up in the entrance. Other animals have been camping in here.


This hollow standing tree has obviously been used before!

This is a termite mound that has been burnt out and a doorway cut into it. These are good for camping in or using as a safe camp fire with your bedroll layed across the entrance for warmth.

A lean-to against a bank. This sort of shelter can also be made up against large fallen trees. You can use tree bark or use your oilcloth to cover it and place sticks on top to hold the roof covering on.

A woodland Indian Wigwam using reed matting as roofing and wall material.

The framework for the Wigwam.

A Wigwam using tree bark as covering and this one showing the doorway. A fire can be lit inside and the smoke goes out via a hole left in the centre of the roof.

Another type of woodland Wigwam using tree bark as a covering. Note the smoke hole at the top.
 Another Wigwam of the same style showing the doorway. These too can be covered in rush or reed matting, though this one is covered in tree bark.
This is the simle framework for the conical Wigwam.


Another simple lean-to using two saplings for the main uprights. There is no tieing here. Forked limbs hold up the cross bar and the cross bar leans against the saplings. Timber is layed inside for a bed and the roof can be bark, reed matting or your oilcloth.


This half-faced shelter is basically a large lean-to with sides added. I actually fill in the sides on the small
lean-to in winter time. Once again this can be covered in bark or several of you can use your oilcloths for the roof. I have used an oilcloth to cover one of the sides on this half-faced shelter to stop the rain from blowing in from the South.
Subscribe to:
Posts (Atom)