A LIVING HISTORY BLOG.

18TH CENTURY LIVING HISTORY IN AUSTRALIA.

Monday, 12 April 2010

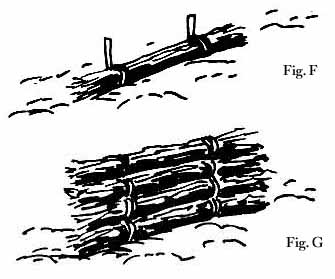
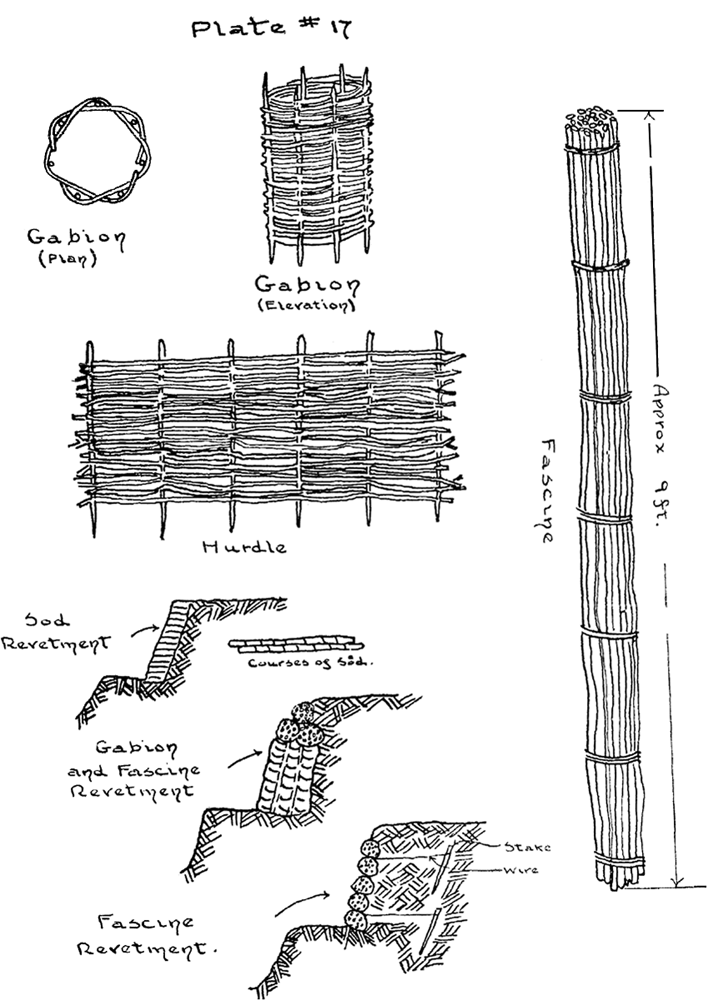
Fascines and Fascine Knives.

From Wikipedia, the free encyclopedia


The fascine knife was a side arm / tool issued to 17th to 19th century light infantry and artillery. It served both as a personal weapon and as a tool for cutting fascines (bundles of sticks used to strengthen the sides of trenches or earth ramparts protecting the batteries).

Two original hand forged Fascine knives that belonged to my Father.

Saturday, 10 April 2010

Shaving in the 18th century.

Many people say that beards are not authentic for the 18th century, this of course simply is not true. Whislt it may be true that being clean shaven was the fashion, that does not mean that everyone was clean shaven! Having a beard is and was always a personal choice and whilst clean shaven men outnumbered those with beards, beards were still worn in the 18th century. 
This image of an 18th century razor borrowed from Smokepoles at: http://smokepoles.blogspot.com/2010/04/here-are-few-of-my-razors.html
This blog is well worth a look see and I think it will get even better as time goes on.

Apparently in the larger version of this 18th century painting three men can be seen with beards.

Twenty pounds reward

Run away from... Alexandria, Fairfax County Virginia, a convict servant man, named John Murphy, born in Ireland, about 28 Years of Age, by trade a joiner, a low set fellow, about 5 feet 4 inches high, struts in his walk, has a pale complexion, large black beard and eyebrows, wide mouth, and pleasant countenance, sings extraordinarily well, having followed it in playhouses in London, talks proper English, and that in a polite manner... It is imagined he has forged a pass and likely will deny his name, trade and place of nativity.


NB All Masters of Vessels are forbid to take him off at their Peril. (August 1760)

Radisson 1957 movie.

Thursday, 8 April 2010

Period Foods. Hackin.

Sir,


There are some Counties in England, whose Customs are never to be set aside and our Friends in Cumberland, as well as some of our Neighbours in Lancashire, and elsewhere, keep them up. It is a Custom with us every Christmas Day in the Morning, to have, what we call an Hackin, for the Breakfast of the young Men who work about our House; and if this Dish is not dressed by that time it is Day-light the Maid is led through the Town, between two Men, as fast as they can run with her up Hill and down Hill, which she accounts a great shame. But as for the Receipt to make this Hackin, which is admired so much by us, it is as follows.


Take the Bag or Paunch of a Calf, and wash it, and clean it well with Water and Salt; then take some Beef-Suet, and shred it small, and shred some Apples, after they are pared and cored, very small. Then put in some Sugar, and some Spice beaten small, a little Lemon-Peel cut very fine, and a little Salt, and a good quantity of Grouts, or whole Oat-meal, steep’d a Night in Milk; then mix these all together, and add as ma¬ny Currans pick’d clean from the Stalks, and rubb’d in a coarse Cloth; but let them not be wash’d. And when you have all rea¬dy, mix them together, and put them into the Calf’s-Bag, and tie them up, and boil them till they are enough. You may, if you will, mix up withthe whole, some Eggs beaten, which will help to bind it. This is our Custom to have ready, at the open¬ing of the Doors , on Christmas-Day in the Morning. It is esteem’d here; but all that I can say to you of it, is, that it eats somewhat like a Christmas-Pye, or is some¬what like that boil’d. I had forgot to say, that with the rest of the Ingredients, there should be some Lean of tender Beef minced small.

Wednesday, 7 April 2010

Making Clay Pots On A Foot Powered Wheel.

Developing Knife Skills By Jim Dillard, Ben's Backwoods Blog.

Developing knife skills:

Developing Knife Skills: A Scandinavian Approach to Competence with the Blade by Jim Dillard.
When bushcraft students show up to class or camp, they are always anxious to begin to work with their knife. They want to make the things they have seen in books and magazines, and by the end of the week, they hope to have a fair level of expertise in knife craft.
Too often these are folks who do not have a solid foundation in the most basic knife handling skills. They may own a respectable collection of blades, but there is a better than even chance that they have never spent the hours of work with a knife that would give them the capability they need. And through no fault of their own, most of them don’t know how to go about gaining the experience that will make them the experts they want to be.
The answer to this is simple. With a little instruction and lots of pleasurable practice, anyone can develop a solid level of competence with the knife, and it can be done right at home. Once the time is invested, an individual can enter the bush with the knowledge that they will be proficient, quick and safe with their most important tool.
The Scandinavian Solution
For a great many years the Scandinavian governments and peoples have taken great pride in their knives and their ability to use them. Most of those governments maintain federal departments charged with encouraging traditional crafts, and although now a thing of a past, their public schools at one time offered manual arts courses centered around the use of the knife. The projects and techniques used in these courses can help turn most willing beginners into top-notch bushcrafters in a relatively short time. This article will take you through one of those projects.
The Tools
First, an admonition – there are all kinds of gadgets on the market that can keep you from learning the use of basic tools. Don’t use them. The only way to acquire the know-how you need is to work with nothing but the tools you carry with you in the woods. The chain saw and the angle grinder may speed up the completion of your project, but they will only get in the way of what you want to learn.
The basic tools you will need are ax, knife and crooked knife.
The ax should be one of a high quality such as those made by Wetterlings or Gransfors Bruks. These have a hardness of about Rc 57 as opposed to discount store axes, which usually have Rockwell ratings in the 40’s. Although most folks here in the Alaskan Bush tend to use axes with handles of about 30” because of their versatility, carving with handles of 17-19” or so is easier and a bit safer.
Since the main job of the crooked knife (sometimes called a bent knife) will be to hollow, you need one with a short, deeply curved blade. If you are going to hollow small items, the crooked knife blade needs to be no wider than 1/2 “ at the base and should taper to a sharp point. The narrow part of the blade near the point will let you reach into small places such as the bowl of an eating size spoon.
Although the above tools are essential, your knife will do 90% of the work, so choose it well. Look for knives with a spear, clip or drop point. The point shouldn’t be much above the middle of the blade. Blades with a big bellies and high points are difficult to carve with. A knife for an experienced user should be between 3 and 4” long. If you aren’t sure what length you need, go with the shorter blade until you know you’re ready for the long one.
Since most bushcraft work is done with wood, a full Scandinavian bevel is a must. Beginning carvers can get quite frustrated with convex or short secondary bevels. The reason is that with these bevels it is difficult to tell the exact angle that the edge will engage the wood. One cut may be too deep and the next too shallow. With the Scandi bevel, however, all you need to do is to lay the bevel flat against the wood, raise it a few degrees and cut. It doesn’t take long to learn to quickly judge the exact angle needed to make consistent, paper-thin shavings.
For beginning carvers it is hard to beat the standard Mora model 120 carving knife. It has a laminated steel blade with a hard core that will retain an edge, and its 2 3/8” blade is safe and easy to control. Even though I carry sheath knives with longer blades, I always have a Mora 120 with me for small carving projects. Most carving schools both in this country and in Europe require the 120 for beginning students. As you become competent with the 120, you might want to also use your regular sheath knife for part of your projects so that you can learn its full potential.


The Mora model 120 and a crooked knife with a point are two of the most versatile tools a carver can own.
Getting Started
You will be working mostly with green wood. Green wood needs special care so projects do not split as a result of drying too quickly, but it carves easily and is a pleasure to use. The special care will be covered later. For eating utensils a fine-grained wood works best. Here on Kodiak Island, the only woods we have that fit that description are alder and black birch, both excellent carving woods. If you aren’t sure which wood in your area to use, contact your local woodcarvers’ club. They will be glad to help.


For a first project try a simple spoon. Using safe ax practices, cut a piece of straight, green wood about 14” long and 3” in diameter. With baton and ax, split the piece end to end just slightly off center. Removing the center of green wood lessens the chance of checking (cracking) as the wood dries, so use the smaller side for the spoon. After drawing a spoon on the wood, use the ax to begin shaping the bowl of the spoon by rounding the end of the wood and notching at the rear of the bowl. Once the drawn handle line is reached with the notch, split off all excess wood parallel to the handle. Watch the wood carefully as you work. If at any time the wood begins to check (most likely on the ends) simply dip it in water.


After notching behind the bowl, split off the excess wood with axe and baton.

Once the roughing with the ax is complete, the fun begins. Use your knife for final shaping and finishing. In tight corners such as where the bowl joins the handle, choke up on the back of the blade and use only the tip. Force yourself to learn to use every inch of the blade to its fullest potential. You will eventually be amazed at the versatility of a well-designed blade.


When carving in tight corners, use only the tip of the blade.


Contrary to what your mother once told you, almost all carving of smaller projects should be toward you. With the edge pointed toward your body, use your thumb to pull the knife through the wood, keeping the thumb to the side of the path of the edge. This way the blade will only travel a few inches instead of the wide and dangerous sweeps associated with carving away from you.


Cutting toward yourself by pulling with your thumb is safe because the blade will only travel a few controlled inches per cut.


While carving your first project, work slowly and observe the edge as it enters the wood. You will find that cutting at a slight angle to the grain direction will make chips that are smooth and easy to pare off. A standard rule is that if the wood begins to split or the blade gets stuck, cut from another angle.


By carving at a slight angle to the grain, chips will come off smooth and clean. Carving parallel to the grain (shown by arrow) the knife will get stuck or will split the wood.


Once the outside of the spoon has been completely carved, you are ready to hollow. If you must leave it over night before hollowing, take precautions to prevent checking (cracking) by dipping the piece in water and storing it in a plastic bag. If you are in the woods, use the old Alaska Native technique of packing it in wet moss or wet grass until the hollowing begins.

Draw a line just inside the outer rim of the spoon bowl. Make it about 3/16 of an inch from the edge. Then using the crooked knife palm up (with the blade closest to your little finger) hollow all around the bowl moving from the rim to the center. By hollowing toward the center, there will be no chance of chipping the edge of the bowl. Once you have carved a half-inch deep or so, you can hollow in any direction without damage to the spoon’s rim.


Always hollow toward the center until the cavity is at least a half-inch deep. This will insure that the knife doesn’t slip and cut the edge of the spoon bowl.


Once hollowed, the inside of the spoon bowl should be sanded, but sanding is best done with dry wood, so the spoon needs to cure first. Slow drying can be achieved by placing the spoon in a plastic bag. Overnight, moisture will leave the wood and condense on the inside of the bag. Each day turn the bag inside out and place the spoon back inside. This lets the moisture evaporate from the wood a little at a time. If the bag is not turned on a regular basis the moisture will cause the wood to mold.


Once moisture no longer forms on the inside of the bag, the spoon is ready to be air dried for a week or so at room temperature. A more traditional drying method is to wrap the spoon in wet moss and let the entire bundle dry slowly in the shade. When the wood is dry, sand the bowl of the spoon, oil with cooking oil or a hardening food-safe oil and use.
The Next Project


After completing the first project, challenge yourself with more complicated designs of spoons, bowls and other utensils. Patterns for projects can be found in an excellent book titled Swedish Carving Techniques by Willie Sundqvist. Although this book is currently not in print, it can be found in most libraries. Examples can also be found by searching the internet with the words “Scandinavian crafts.”


With each project you will become more competent and more at ease with your tools. I have never known a bushcrafter or woodsman who, after completing several dozen such projects, wasn’t totally competent with the knife. Because no job in the woods is more complicated than making a fine ladle, skill gained doing traditional Scandinavian woodcraft will enhance every aspect of outdoor knife use.


After completing several dozen traditional Scandinavian wooden ware projects with hand tools, the average bushcrafter will have the skills needed to do just about any knife job the wilderness requires.


Once a high level of knife skill has been achieved, projects such as this camp-made leister will be a breeze. Although an axe and a gimlet were used in making this effective fish getter, the knife did 90% of the work.


The bushcrafter’s reward. Food gathered with devices you made cooks in a wooden boil box and will be served with a newly carved ladle. All items made in camp with simple tools.
I would like to thank Jim Dillard and Ben's Backwoods for this excellent article and images. It is very much appreciated.
You can access Ben's Backwoods Blog at: http://bensbackwoods.blogspot.com/2009/11/developing-knife-skills.html

And Ben,s site at: http://www.bensbackwoods.com/servlet/StoreFront


Tuesday, 6 April 2010

Bush Blacksmithing. Forging With A Rock Anvil & Hammer.

I have not posted this for what is being made in this video, it would be far simpler to use a pointed stick!!!
But the forge method itself is one I have used, and it is worth seeing what you can do with and ordinary fire and a couple of rocks. At home I use an open fire and a piece of railway iron for an anvil.